Abstract Birthday
Use our step by step instructions to create this Stylish Happy Birthday Card.
Abstract Birthday
Use our step by step instructions to create this Stylish Happy Birthday Card.
Experience level: Intermediate
You will need:
- Foundations Card Teal A4 220gsm pk 25 40985
- Foundation Card Coconut White A4 220gsm pk 25 40980
- Woodware Clear Singles Stamp – Slashes FRS720
- Sentimentally Yours Birthday Sentiment Cloud Rubber Stamp SYR016
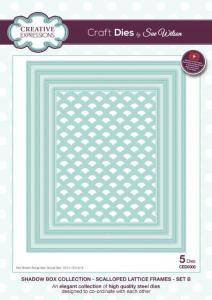
- Shadow Boxes Collection Scalloped Lattice Frames – Set B CED9306
- Cosmic Shimmer Glitter Kiss in Golden Sand CSGKSAND
- Staz-On – Black ST-31
- Graphmaster Alcohol Marker GRAPHBLACK
These handy tools will make your card creation process much simpler!

Step by Step Instructions

Step 1
Cut a frame out of Coconut White card with the Lattice Frame. You can also cut it by hand.
Tip: The Noble collection has great rectangle and square frames that you can use over and over.

Step 2
Cut and fold a piece of Teal card to 14.9 x 18cm.
Tip: Use a bone folder to give a crisp crease.

Step 3
Colour the frame with Cosmic Shimmer Glitter Kiss, apply a very thin layer if you want the stitching to keep showing.

Step 4
After drying add another layer and let it dry again. The first layer will give you some “bite” so the next layer is even easier to apply.

Step 5
To stamp straight: Prepare your stamp as follows – this is optional but makes stamping so much easier. Lay down a piece of thin paper with some tape on the back sticky side up along one edge.

Step 6
Line up the stamp with the paper using a ruler as a guide, and press the stamp to the tape.

Step 7
Turn over the stamp and paper. Then put the ruler on the edge of the paper and draw the line with the alcohol marker. This line will be your guide for stamping the sentiment straight.

Step 8
Stamp the birthday sentiment on a thin piece of paper, and fussy cut the paper just around the words. This will be the mask for the next step.

Step 9
Stamp the birthday sentiment on Coconut White card using black ink.

Step 10
Put the mask over the stamped image and secure with low tack tape.

Step 11
Turn the stamp a quarter and stamp the image on the card and over the mask

Step 12
Do the same at the bottom of the card then remove the mask.

Step 13
Your stamped background is done.
Tip: Keep the mask to use multiple times.

Step 14
Stamp the slashes randomly on the frame.

Step 15
Tape the stamped image to the card.

Step 16
Attach the frame on top with foam tape to create some dimension and complete your card.